Search OfficeBooks Help

Showing posts with label getting started. Show all posts

Monday, 7 May 2012

Introduction

Welcome to OfficeBooks.
This is an overview that provides the basic information you need to get up and running with OfficeBooks.   For help with any issues, please contact us at support@officebooks.com
After you have registered, there are some setup tasks you should perform.  Click Settings at the top right hand corner of OfficeBooks to display the Settings menu, where you will find links to the forms needed to accomplish these tasks.
Inviting your staff to join your OfficeBooks account is a good starting point.  
OfficeBooks uses Windows Live for authentication; therefore all users must have a Windows Live ID in order to join your OfficeBooks account.
You can use the ‘invite your staff’ link provided immediately after registration or use the invitation form available from the Manage Users form.  
Customizing your business profile is also recommended. See Business Profile Settings.
                                                                 
  1. Add your customers to the Contacts list.
  2. Add your suppliers to the Contacts list.
  3. Add the items you buy and sell to the Items list.

To facilitate adding items, use the Excel template provided by OfficeBooks to upload your items data. See Importing Items.

That's all you really need to get started.  Now you can create new quotes or sales, and generate purchase orders for things you need.

Tuesday, 6 March 2012

OfficeBooks Help - The Dashboard

The dashboard presents a “snapshot” overview of your business, allowing you to make informed decisions based on up to date information.

You can view action items and events, add to your To Do list as well as upload files and perform scheduling tasks.


Action Items

Action items (alerts) are automated reminders of tasks which need to be completed so nothing gets overlooked.

For example, OfficeBooks action items will alert you when a purchase order requires approval or you have shipped product to a customer and an invoice needs to be issued.
The value column shows the number of items requiring action.

Learn more about Action Items


Latest Events

This is a list of recent activities OfficeBooks tracks for you.

Radio buttons to filter the latest events based on your selection.  The default view shows all latest events.
You can also filter on Sales or Shipments.

Event Links: each item in the events list will take you to the details about the item, work or purchase order, etc.

Thursday, 1 March 2012

Getting started with custom record numbers

If you would prefer to use your own numbers for purchase orders, sales orders (quotes), and invoices follow these instructions to make us of the Reference # fields as an alternative to the OfficeBooks assigned record numbers.

Under the Business Profile section in your settings menu, you have check boxes in each of your document setup tabs.


When these checkboxes are checked, OfficeBooks will generate PDF reports (like Purchase Orders, Quotations, and Invoices) using whatever number you choose to enter in the "Reference #" field on that record.

Given the broad range of user requirements and situations, we've opted to allow the Reference # field to contain anything.  Duplicates are okay, it can be empty, etc.

We plan to add some (optional) automation to support this.  So if you want the Reference # field to auto-increment, or have a standard prefix or suffix - that will (eventually) be possible.

Comments?  Send us an email to let us know!

Wednesday, 29 February 2012

Workflows


Workflows are part of the Bill of Materials record related to an item.  They allow you to define the steps to follow when manufacturing your product.

After setting up your work centers, you can add, edit, delete, and re-arrange the workflow steps on the Bill of Materials screen.  The estimated hours field is useful for you to get a sense of how long a batch of parts should take to run through the manufacturing step.  When OfficeBooks introduces its production scheduling tools, they will rely on the estimated hours in your workflow definitions as well as the "Daily hours" you define by work center to map out your production plan.

After you define your workflow, you can link subcomponents on your Bill of Materials to specific steps in your workflow.  This will be reflected on the PDF copy of your work orders.

Thursday, 9 February 2012

Unit Inventory Value

The Unit Inventory Value is the amount (in your local currency) something is worth from an inventory perspective.  Generally speaking, it's the cost of the item when you bought it.  In fact, the value is updated for you automatically by OfficeBooks when you buy an item using a purchase order.  If you already have inventory of the item, OfficeBooks will use a weighted average calculation to adjust the Unit Inventory Value.

If you have 8 widgets, and the Unit Inventory Value is $3.00, your "Item total value" is $24.00 (8 x $3).

You can use the "Adjust Value" button to change the Unit Inventory Value manually.  This should be done with care as changes in inventory value (typically) have tax implications for your business.

In the future, OfficeBooks will offer a set of depreciation tools to adjust values globally.

Careful: don't confuse the Unit Inventory Value with the sales price.


Thursday, 2 February 2012

Dashboard: Action items explained

The Dashboard is your key to staying on top of your business.

The Action Item section of the Dashboard is an easy way to keep track of the work that needs to be done.

Here is what each type of action item means:

Make Item Shortages (you need to create work orders):

  • This displays a count of items where demand from sales or work orders exceeds the supply (current stock plus the quantity being built on work orders).   Clicking on the "Make" link will display the items in this shortage state.
Buy Item Shortages (you need to create purchase orders):
  • This displays a count of items where demand from sales or work orders exceeds the supply (current stock plus the quantity already on order from your suppliers).  Clicking on the "Buy" link will display the items in this shortage state.
Sales Ready to Ship:
  • This displays a count of sales that have enough stock to cover the order quantity.  Clicking on the "Sales" link will display a list of sales that are ready to ship.
Purchases Awaiting Approval:
  • This displays a count of purchase orders that have been requested.  They require review and approval before they can be sent to suppliers.   Clicking on the "Purchases" link will display a list of POs that are waiting for approval.
Purchases Approved not Ordered:
  • This displays a count of purchase orders that have been approved and are ready to be sent to your supplier.  Clicking on the "Purchases" link will display a list of approved POs.
Work Orders Ready to Pick:
  • This displays a count of work orders that have been created and have no shortages preventing work from getting underway.
Work Orders in Progress:
  • This displays a count of active work orders.
Invoices Required for Shipments:
  • This displays a count of shipments you have made against sales orders without a linked invoice.  Clicking on the "Invoices" link will display a list of uninvoiced shipments.
Overdue Purchases:
  • This displays a count of purchase orders that are late from your suppliers (haven`t been received by the requested delivery date).  Clicking on the "Overdue" link will display a list of late POs.
Item Revisions Awaiting Approval:
  • This displays a count of shipments you have made against sales orders without a linked invoice.  Clicking on the "Invoices" link will display a list of uninvoiced shipments.

Wednesday, 1 February 2012

How to re-activate (undelete) an item record

To re-activate an item, first go to the items list.
Step 1: Go to the items list


  • Check the "View Inactive" check box
  • Select & open the item record you wish to re-activate
  • Expand the "Other Details" section
  • Check the "Active Item" check box
  • Click "Update" or "Save & Close" to complete the operation.
Re-check the active flag in the Other Details section

Deleting Items in OfficeBooks

By making item records inactive, you effectively delete them from your items list.  They will no longer be available to add to new sales, purchase orders, or work orders.  Existing records that include the item you are making inactive will not be affected by this operation.


  • From the items list, click on the item record you want to make inactive.
  • Expand the "Other Details" section of the item record.
  • Un-check the "Active Item" check box.
  • Click "Update" or "Save & Close" to complete the operation


Related: How to Undelete Items

Friday, 4 November 2011

Creating an Invoice

You have several options to create an invoice.


The typical approach to creating invoices is to first create a sale, then ship items from that sale, then create an invoice linked to your shipment.


The Create Invoice link is available from the
shipment detail screen
After the shipment is complete, the shipment details screen offers the option to create an invoice (top-right corner).


Clicking on the Create Invoice link automatically generates an invoice record.  You can adjust the invoice as necessary before saving the invoice record.  To generate a printable invoice, click the PDF Invoice button.


Depending on your business type, "shipping" could be an unnecessary and counter-intuitive.  Don't worry, you have options.


Sales Invoices
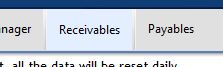
The Receivables button is available
from the main toolbar
You can create an invoice linked directly to a sale (no shipping).  To create this type of invoice, first click on the Receivables button from the main toolbar.  This will bring you to the Customer Invoices list.


From the Customer Invoices screen, click the "New Invoice" link.


From the "Invoice Type" drop-down, select "Sale".  Wait for the screen to complete its refresh, then select the sale you would like to invoice from the "Invoice to" drop-down list.  This list will be filtered by default to only show sales that are active and not invoiced.  You can display all sales by clicking the checkbox over the  drop-down menu.


After selecting a sale, the invoice details will be automatically fetched from the sale.  Adjust as desired, then click Save to complete the operation.  Click PDF Invoice to generate a printable invoice.


Contact Invoices
You can create an invoice linked directly to a contact (no sale or shipping).   This invoice type would be more common for businesses that sell intangible goods (consulting, rental properties, etc).


From the "Invoice Type" drop-down, select "Contact".  Wait for the screen to complete its refresh, then select the contact you would like to invoice from the "Invoice to" drop-down list.  This list will be filtered by default to only show contacts that are active and are customers.


Add line items as necessary, adjust pricing (remember to click the check mark to save each line as you go), then click Save to complete the operation.  Click PDF Invoice to generate a printable invoice.


Thursday, 27 October 2011

Settings - User Management

User Management is accessed from the Settings form. 

Click Settings to display the form then click Add/Remove users and roles to display the Manage Users list.

Adding Users

  • Click Add/Invite User to display the Add/Invite Users form. This form contains instructions on how to invite another person to participate in your OfficeBooks account.
  • Pay close attention to the Role field as this determines the level of access an individual has to your business data.
  • When you click Send Invitation an email invitation with a link to OfficeBooks is sent to the specified email address. This link contains a unique invitation code.  The invitation also contains instructions on how to join your OfficeBooks account.
  • By default, a copy of the invitation is sent to the email account you used to register with OfficeBooks.

Note: If you want to allow a user to release Purchase orders, you must set their approval limit by editing the user profile after the user has been invited.


Edit and Delete User Profiles

Click Edit/Delete in the first column of the Manage Users list to display the Role Editor form. This form allows you to:
  • Change the role (access level) for the selected user.
  • Set a Purchase order approval limit for the selected user.  The approval limit authorizes users to approve a Purchase order up to the currency amount you enter here.  The default approval limit is zero. Users with an approval limit of zero will not be able to approve any Purchase orders.
  • Remove users from your account by clicking Delete on the form.

OfficeBooks User Roles
  • Role 1:  Read only access.  No access to financial details.
  • Role 2:  Can create or edit records.  No access to financial details.
  • Role 3:  Read only access.  Can access financial details.
  • Role 4:  Full access to all records, including data export.
  • Role 5:  Full access to all records, including data export.  User management rights.  (Business owner)

Import Items

When you need to add numerous items to OfficeBooks the easiest way is to use the Excel template to enter basic information and then upload your data. The template allows you to enter the following information:

  • Item (part) number
  • description
  • internal notes
  • current stock level
  • minimum stock
  • cost
  • price
Other items fields can be manually adjusted once the import process is completed.

How to Import Items:
  1. Start at the Items Import Page
  2. Click Excel template and save the template to your computer. 
  3. Open the template and follow the instructions provided. 
  4. Select your Excel file 
  5. Click Submit

Settings - Business Profile

Your Business Profile is accessed from the Settings page.

Click Settings to display the form then click Business Profile Settings to display your business profile. Your business profile allows you to customize forms and set default financial options for your business.

OfficeBooks has set some defaults, so it’s a good idea to review the data in each tab.

Customize your Business Profile
  • Add your business logo. This logo is printed on your sales orders, purchase orders and invoices.  Note the image size requirement.  If your image is very large, it will distort the formatting on some of your records.
  • Click on Sales to review and edit standard text printed on your sales quotes and sales acknowledgment forms. 
  • Click on Purchases to review and edit standard text printed on your purchase orders and requests for quotes. 
  • Click on Invoices to review and edit standard text printed on your invoices and packing lists. 
  • Click on Taxes to provide tax names and percentages used in your business.  (e.g. GST  7%)
  • Click on Currency to select your default business currency and add the currencies you use on a regular basis to your currency conversion list.